I owe an update on our bathroom/bedroom remodel. It’s been a few weeks since I shared our progress and there has been a lot of great progress. Sharing just a glimpse today of what’s going on in there because most of the space has been covered up with rolled paper and plastic sheeting to protect the remodel while 80-year-old floors go through a makeover of their own.
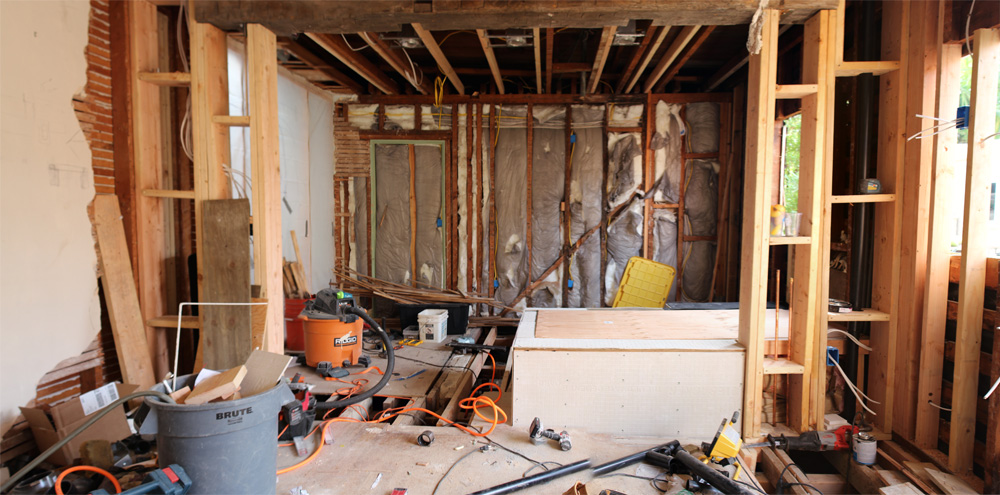
Just as a quick reminder of where we’ve come from:

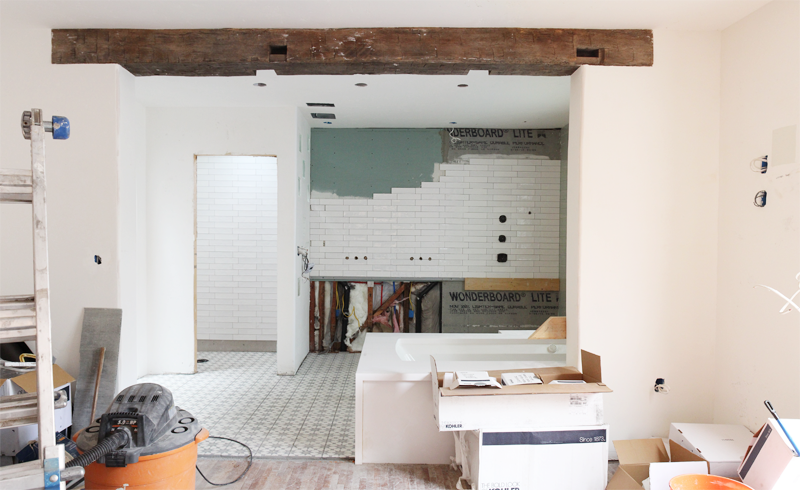
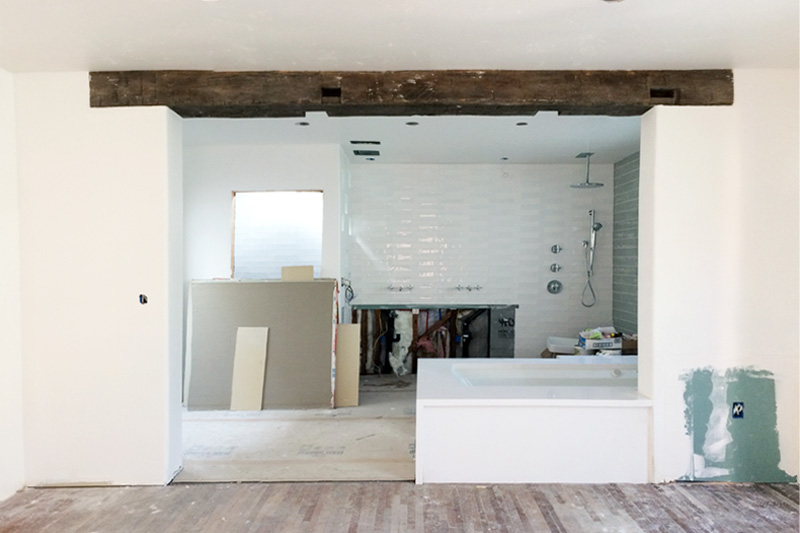
The rest of the tile is complete! Even the fixtures are in place and I’m over the moon on those. I’ll save that for a future update where we can really dive into all of that chrome.
If you check out the floors in the very first photo in the above sequence, you can see that big patches of wood were missing from the bedroom floors. The original bedroom’s tiny closet had walls and studs where flooring now is (imagine an outline of the closet) and the even tinier pocket bathroom had a tile floor.
Here’s how that looked from a birds-eye perspective:

We wanted the room to feel as if it had alway been a rectangular room without those two small space notches cut out.
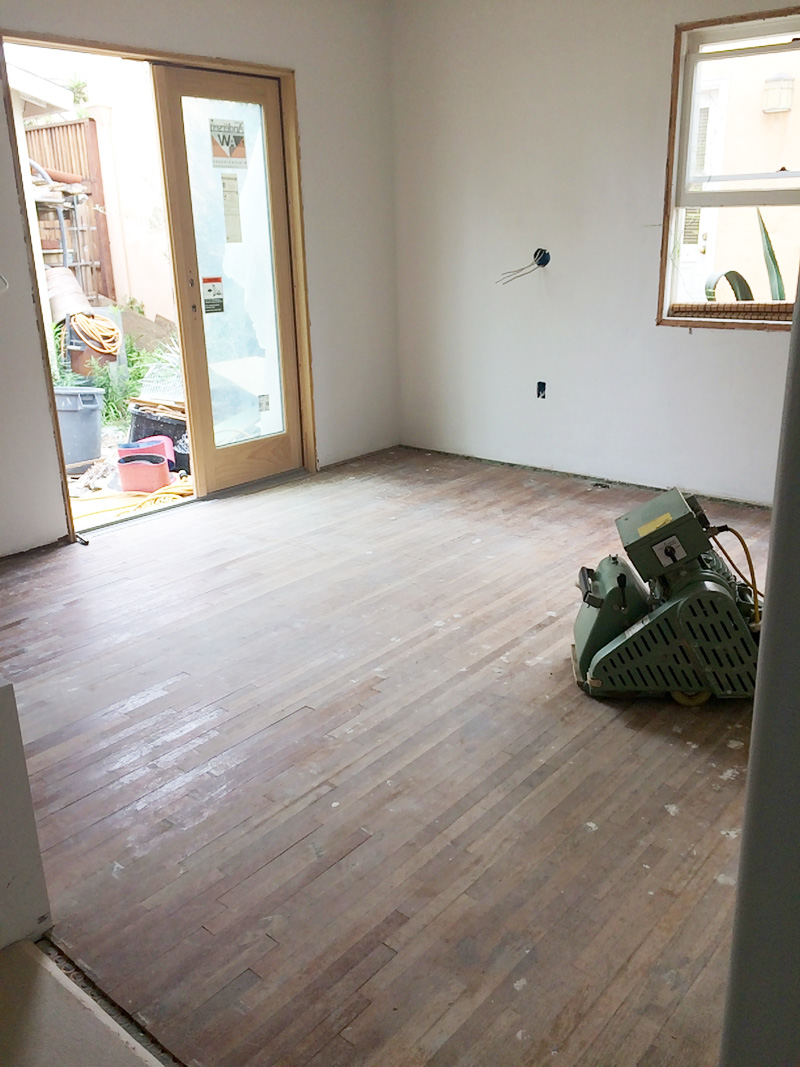
First things first for our revived floors was to patch in oak. We hired professionals to take care of this job because it’s such a delicate one. Because we tore out hallway space (with wood) and made it bathroom space (with tile), we had plenty of original oak strips to reuse in this space.
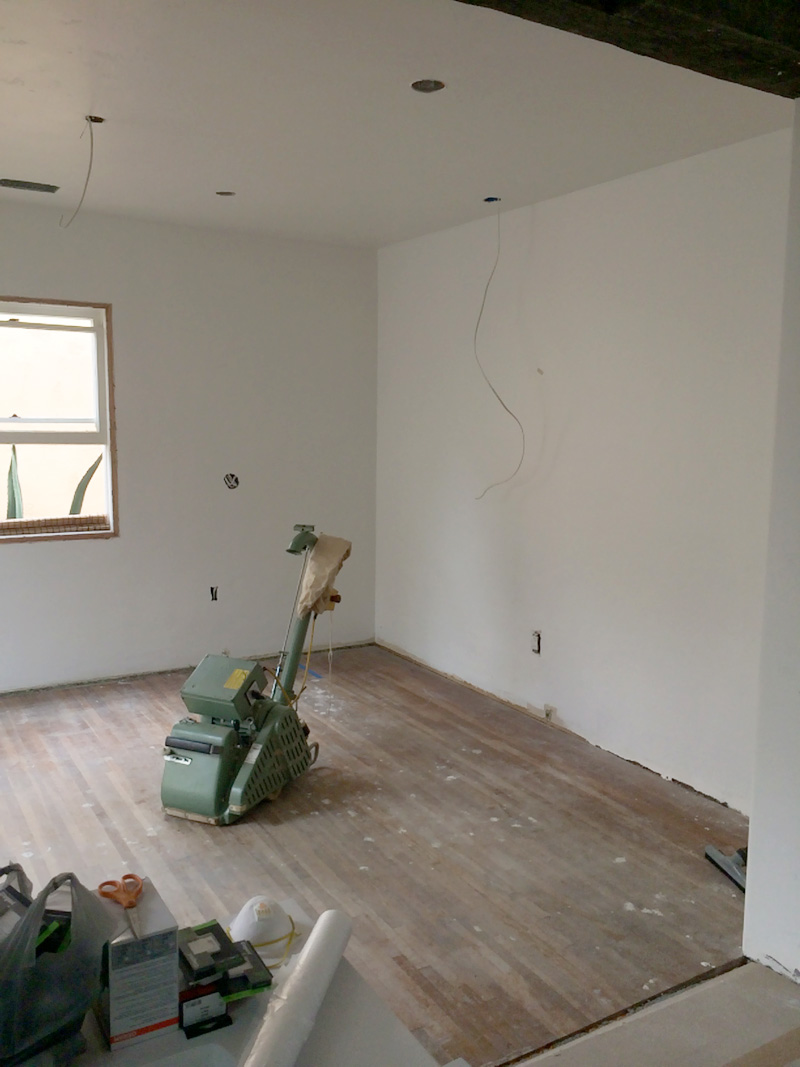
Once patching was complete, sanding ensued. I was prepared for a sandstorm throughout the house, I had heard rumors that sawdust ends up everywhere. everywhere. Surprisingly it wasn’t so horrible (but maybe that’s because I’m already used to a lot of dust and dirt in the oddest parts of the house….).
They did a great job on patching, can you see the outline? Some of the newer (older) wood is glossier than the original.
(the closet is moving into this below wall area as we speak!)
While we had the flooring team in there, we pulled all of the furniture out of the girls’ room to sand, stain and seal their floors as well. Previous to us moving into our home many of the bedroom floors were covered with wall-to-wall carpeting. When the carpeting was pulled up, raw wood and large water stains became pretty noticeable (even stains from sealant seeping under carpeting from finished rooms from the last time these floors were sanded). The spots were noticeable enough to use large area rugs in most of those bedrooms. It made sense now to sand and stain and to get everything up to par.
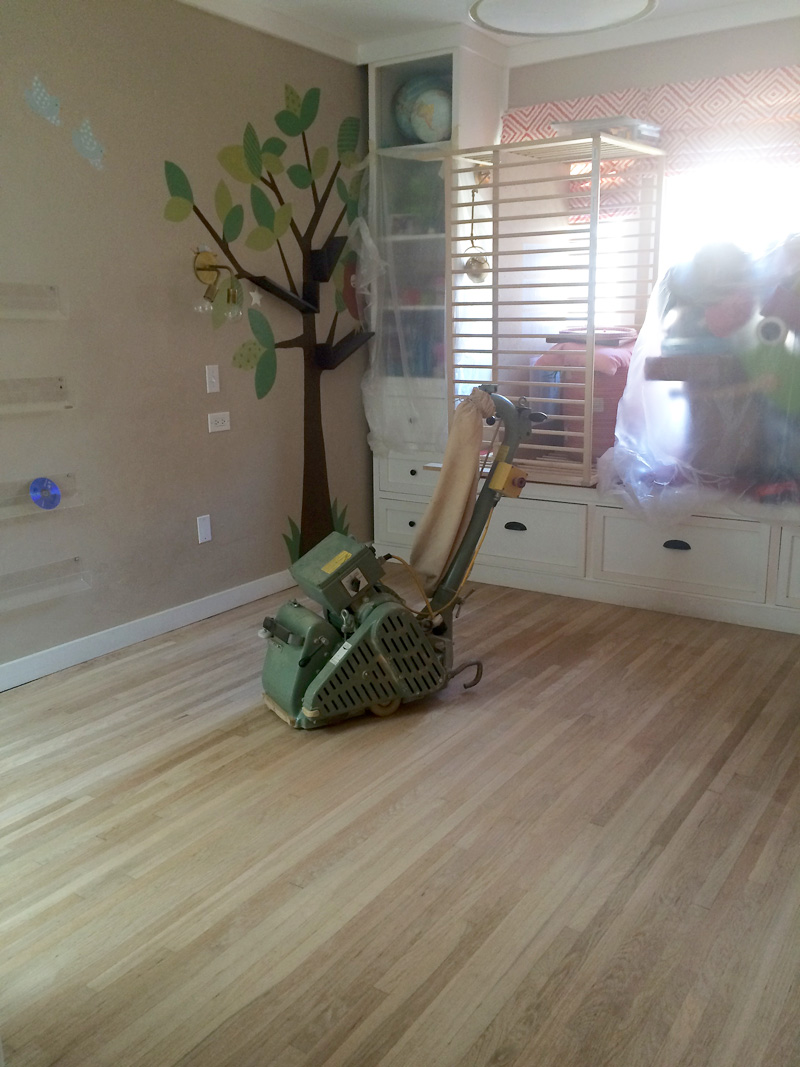
Over the three day process the wood was sanded, stained with two coats of a water-based polyurethane and on the final day it was completely sealed. We can’t move heavy objects (or even the rug) back into the room for 7-10 days (surprise! says the sealant container), which means that the girls have been officially camping on the couch for two weeks. Some bad habits are being formed right now in this household :), one may or may not be everyone climbing into mom and dad’s bed in the guest room in the middle of the night… it’s getting a little snug.
Can’t wait to share the results of the finished floors once they’re photographable. Have a wonderful weekend and a great Father’s Day!
Full remodel progress tracked right over here.
The post Master Bed & Bathroom Remodel: Week 17-18 appeared first on Pepper Design Blog.


